RECORDING AND SHARING A MEETING – ZOOM
Enabling Recording Option in Zoom
- Sign in to Zoom
- Click on Settings on the left hand menu
- Click on the Recording Tab
- Turn on Local Recording and Cloud Recording
- You can customize each option
Recording a Meeting
- Once you start a Zoom meeting as the Host
- Click the option to Record on the bottom menu of the Zoom meeting
- You have two options Record on this Computer or Record to the Cloud.
- Record on this Computer. This option stores the file locally and can later be uploaded to a file storage service like Dropbox.
- Record to the Cloud. This option stores the recording in the Zoom application which will need to be downloaded to share it.

- You have two options Record on this Computer or Record to the Cloud.
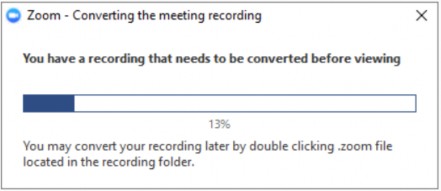
- Once the meeting has ended, Zoom will convert the recording and you will be able to access the files.
Note: By default, the audio/video file (MP4) will be named Zoom_0.mp4. The audio only file (M4A) is named audio_only.m4a.
Accessing Recorded Meeting – Record on this Computer
By default all local recordings are stored in the Documents folder under Zoom
Accessing Recorded Meeting – Record on to the Cloud
- Click the Recordings tab on the left hand side
- Once in the Recordings page, you will find a list of recorded meeting
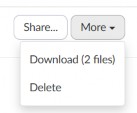
- You have the option to Share the recorded meeting(s) by copying the link provided to you and also modify permission of who can view/ download the recorded meeting(s).
- If you click on More option, you have the choice to either Download or Delete the recorded meeting.
For more information you can visit the Zoom Recording Link
Uploading and Sharing Recordings in Dropbox
Record on this Computer
- Login to https://dropbox.cuny.edu (with CUNY Login credentials)
- In the Home tab, click Upload Files
- The file upload windows comes up, click Documents on the left
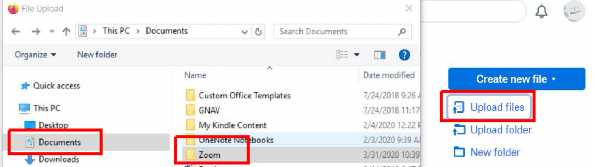
- Double click Zoom folder, select Recording (saved by date) you would like to upload, double click on zoom_0 file.
- Click Upload
- In Dropbox you can share the file with your students or download it by clicking the three horizontal dots on the far right of the file.

Zoom - Record on to the Cloud
- On the left hand side click on Recordings, list of recording will be available to Share or Download and Delete.
- Click on Download to save on your computer, from your Dropbox account you can upload the file.
- Once you login to Dropbox, in the Home tab, click Upload Files
- The file upload windows comes up, select the location where you saved the recording, click Upload.
Last Updated: 04/01/2024 10:17